A story of space invasion and bedside lighting ...
This project is actually two projects. The first one is an ultra low cost LCD projector. The second one is a bedside table lamp that shows the time.
The first inspiration for a super cheap projector came from the documentary "Exit through the gift shop" about the history of street art and/or a cynical view on the art scene in general. One of the shown street artist was "Invader". His thing was to glue little space invader mosaics to structures around the city. He considers himself a "hacker of public space spreading a virus of mosaic".

I simply loved the idea to place little pieces of art in various location around the city for people to discover. However, I found the medium of mosaic a bit limited by its static nature. There must be a better way to hack public spaces visually. So instead of using mosaics, I got a bit obsessed with the idea of using projections. My version would consist of little solar powered projectors hidden in public spaces, broadcasting messages and animations at night whilst charging at daytime.
In order to make this feasible, the whole set-up would have to be cheap ... dead cheap. Unattended projection hardware pumping out awesome imagery would most likely be stolen or destroyed within a very short amount of time.
This lead to the projector as described below.
Unfortunately, once I was finished with the projector part I realized that although it works, it is in fact unusable for the intended purpose. The core problem is a maximum projection distance of ~15cm, reducing the amount of suitable locations in a city to virtually zero.
So I had a projection solution but no application.
What finally gave me the idea to use the projector in my lamp project were the other properties of the projector ... round projection image and extremely low resolution - a perfect fit.
I hope you enjoy the build.
Features:
- Lovely monster pixel style back-projection display with virtually unusable resolution
- 180-ish° field of view
- Space Invaders!!!
- Glows in the dark
- Is made from half a phone and car parts
- Costs as much as your HDMI cable
The Projector
A projector is basically a light source illuminating an image plane that is then projected onto a projection surface using a projection lens.
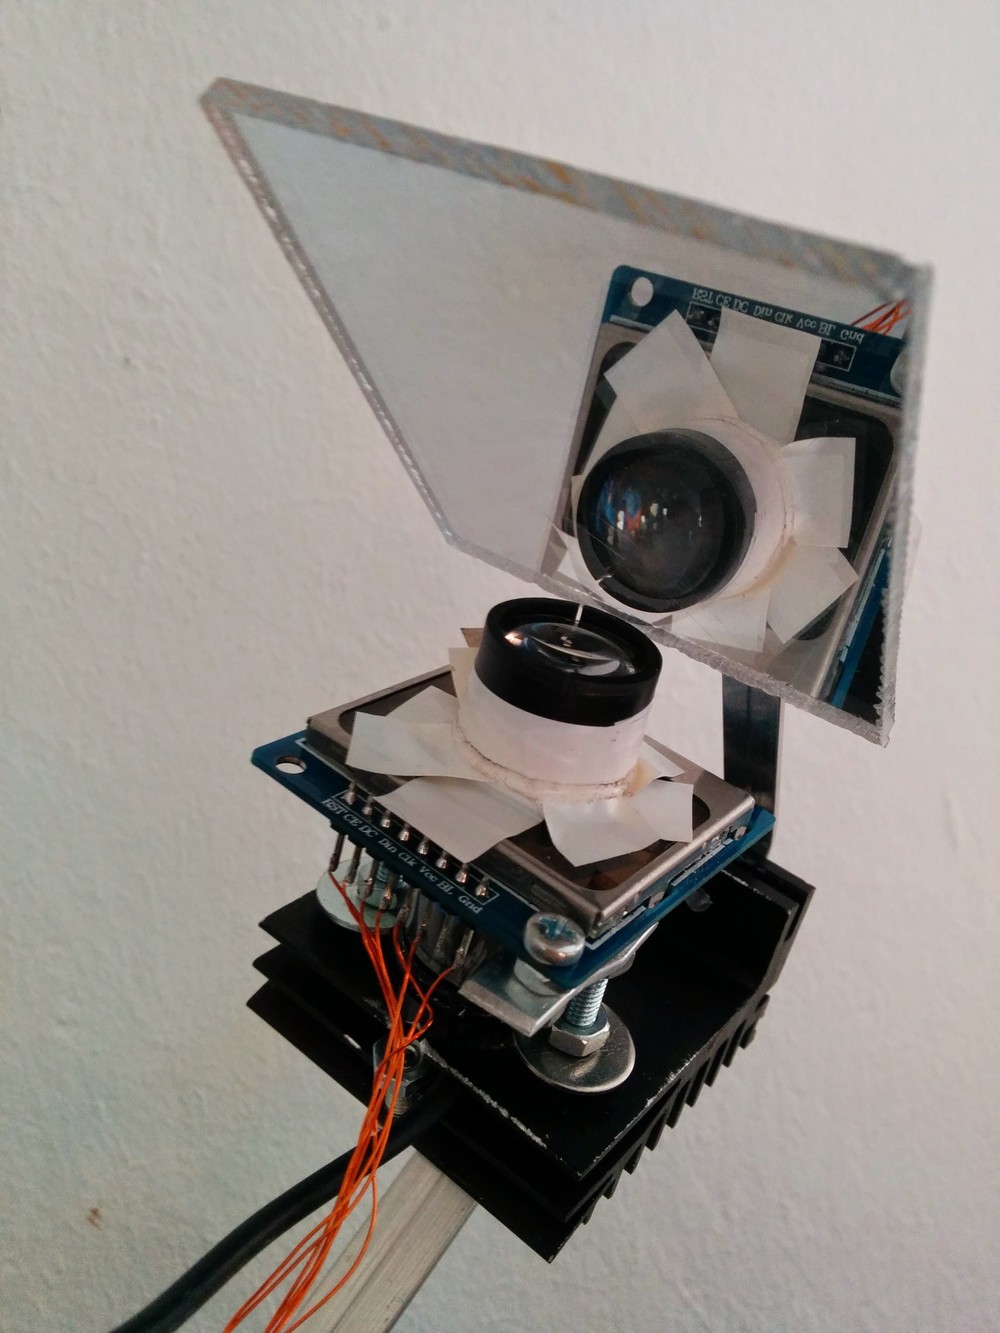
So in order to build the cheapest possible projector, I looked for the cheapest possible LCD and projection optics. The LCD part is easy: I used the trusty Nokia 5110 LCD display that costs ~2$ including shipping (I got 10).
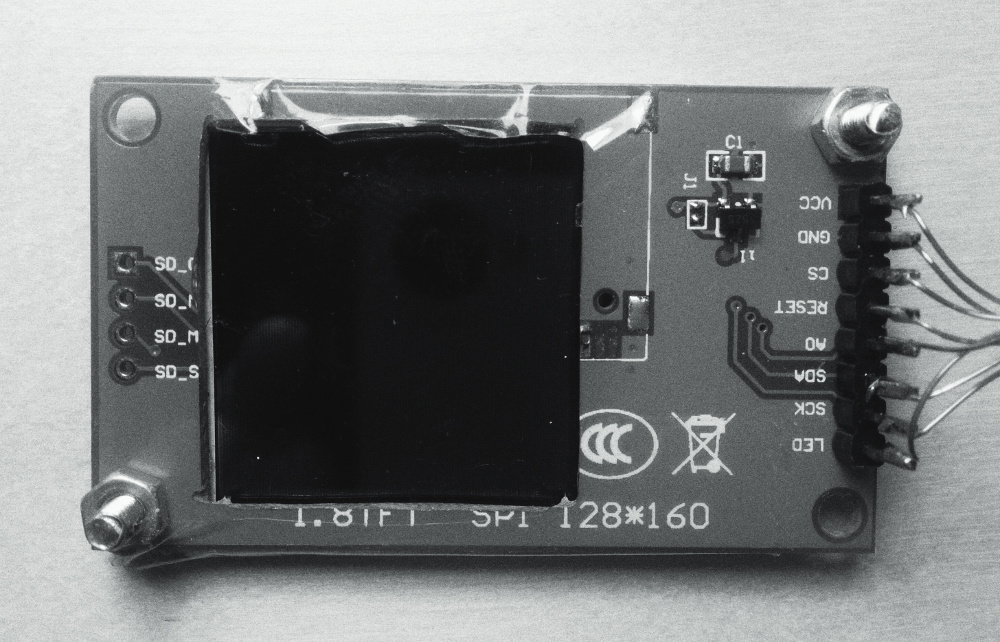
To convert the Nokia 5110 LCD into a back-projection display, one merely has to remove the back-light including diffuser, peel away the reflection foil on the back and cut a big gaping hole in the PCB (requires rerouting of some/all traces). This process uses up about 3-5 of your acquired 5110 displays. I used an Arduino with the Adafruit LCD library to drive it. Great ... display done. (The picture shows a ST7735 colour display that I tested later - the procedure is identical for the Nokia 5110)
The optics part was not quite so easy ... I experimented with zoom flashlights and magnifying glasses for a while which worked reasonable well. I abandoned the approach because of two simple reasons: 1) Zoom flashlights are a great light source however not that cheap to come by (we want to go ultra cheap remember) 2) magnifying glasses don't give you an evenly focused image if projected on a plain. Luckily I stumbled over a much better solution that solves both problems at once: Car logo projectors!!!
If your car happens to be logo projector-less (shocking) here is what it does: a miniature projector installed at the bottom of every door projects a static brand logo on the pavement once the door opens. This is awesome for various reasons:
These things are dead cheap (10$ a pair), they come with projection optics, condenser and best off all, an LED light source including constant current supply.
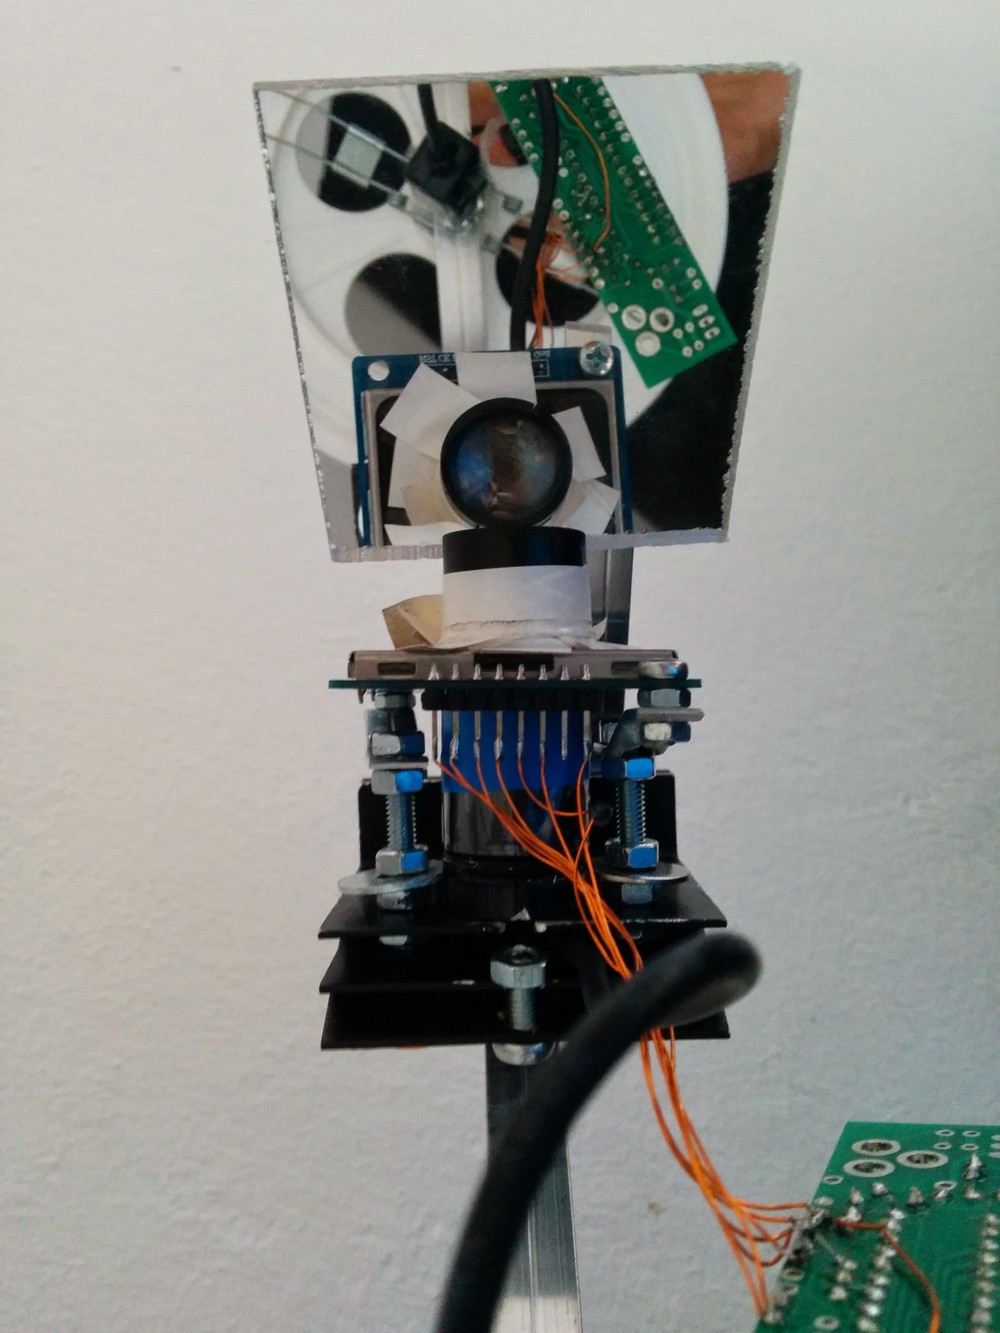
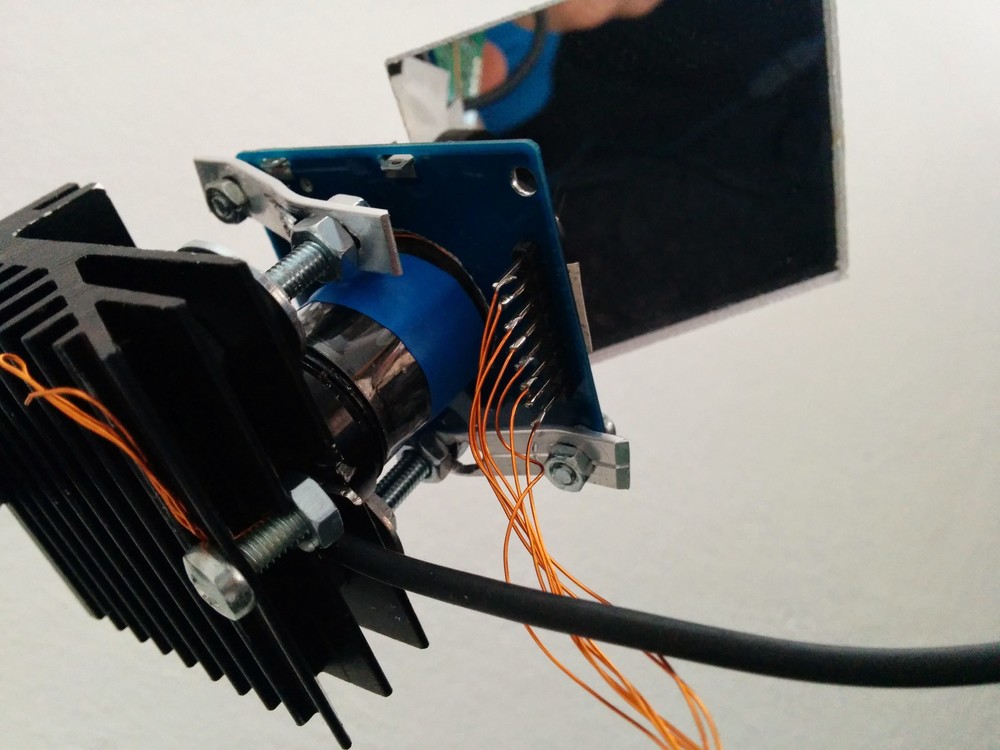
To make them usable as projection optics, a few modifications were required. First off, I opened the projector and removed the little plastic tube that holds all lenses including the logo disk. I then cut the optics tube at the precise location of the logo disk. I mounted the LED part onto a spare heat sink and wedged the condenser part of the optics between the modified LCD and the LED light source. The LCD was then fixed to the heat sink with the help of a few aluminium strips. Finally I 'mounted' the projection part of the optics on the LCD with the help of some trusty PVC tape.
I did some basic tests and found the projection quality to be infinitely better than my previous attempts with flashlights and minifying glasses. Nice contrast, crisp image ... maybe a bit dim.
Once I finished the projector part I tested it against various surfaces and I realized very quickly that this projector is not really usable to project in open spaces. The projection optics and light source are optimized for a projection distance of something like ~15cm. Beyond that, images are increasingly dim, monstrous and out of focus.
I played with some geometrical optics software to rectify this but eventually gave up. (I suck at optics)
So I had created an awesome little projector but had no application for it.
It was lying in a box for a few months before I found the perfect match for it.
The lamp
I need two vital things next to my bed: a night-readable clock and a dimmable light. The clock's purpose is to find out if there is still a point of going back to sleep when the kids woke me up (again) and the light's purpose is to bring said kinds back to bed without falling over stuff (possibly other kids).
So I had the vague idea to build a clock/lamp hybrid thing but no idea how to make it look nice enought to pass the wife acceptance test. Nixie would have been awesome, but I am not crazy enough to put a high voltage SMPS next to my bed. So I kind of shelved the project until I saw one of these projection clocks on ebay.
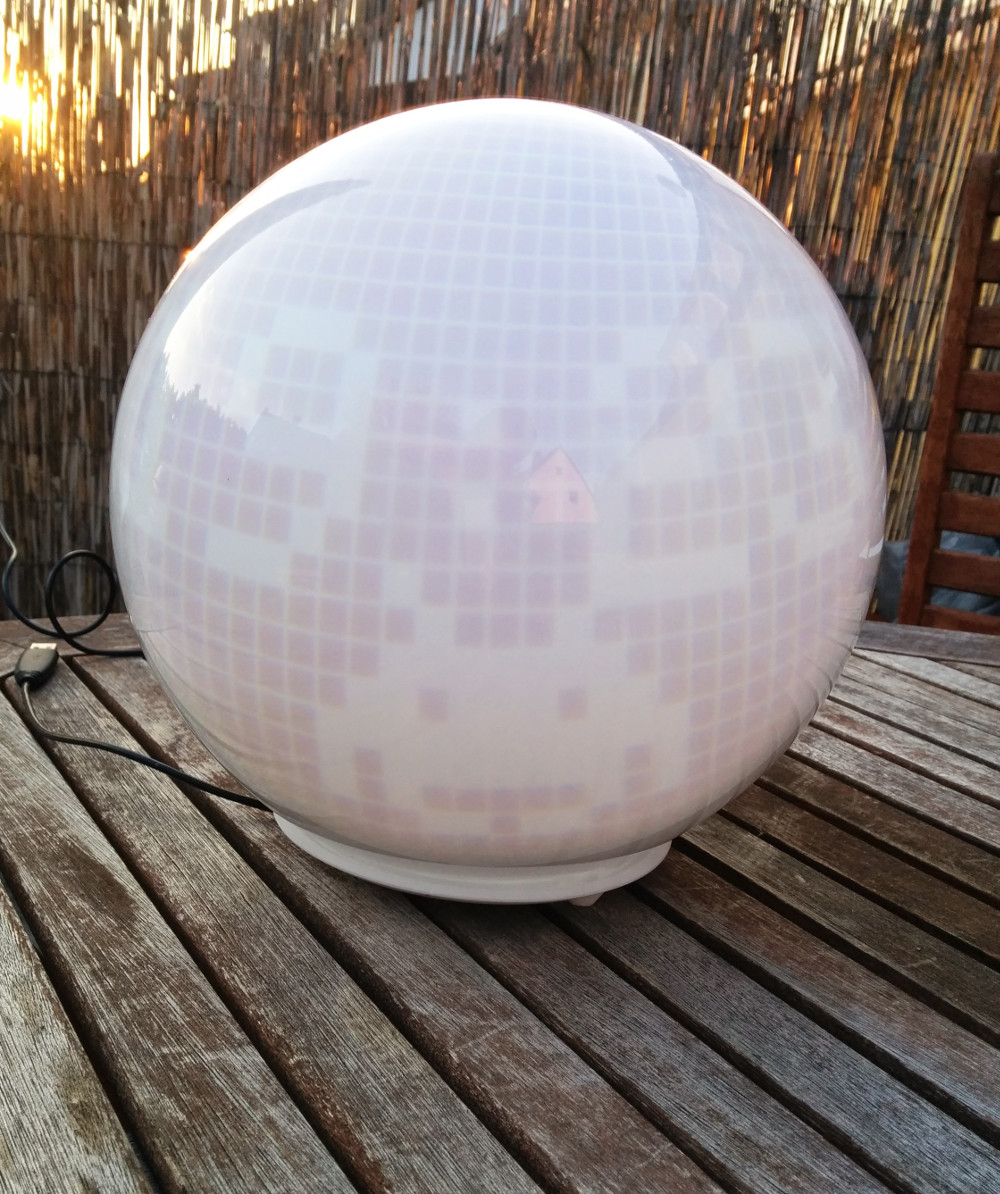
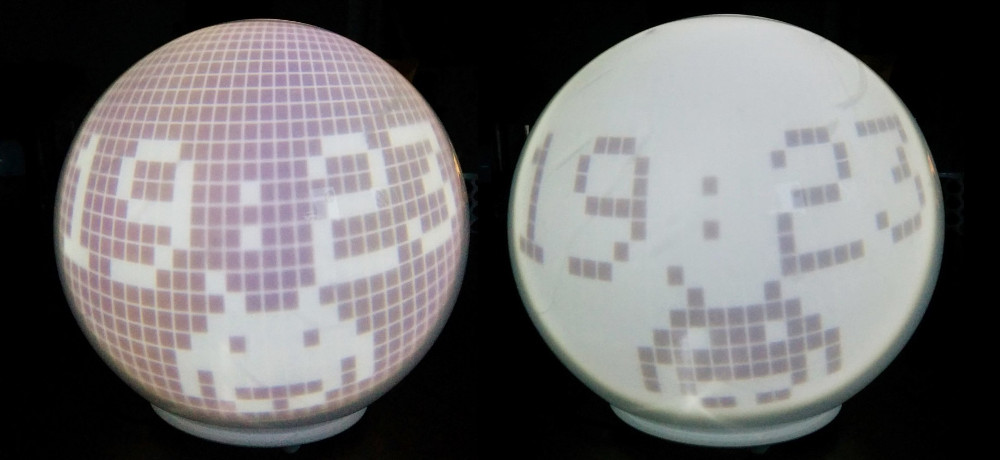
These clocks have a small LCD display plus projection optics to shine the current time onto the ceiling (neat). The steps "oh ... I can project stuff onto the ceiling" to "no I can't because it would be huge" to "oh ... why don't I stick it in a lamp instead" to "oh ... look at that ... nice lamps are round and so is my projection image" followed in rapid progression.
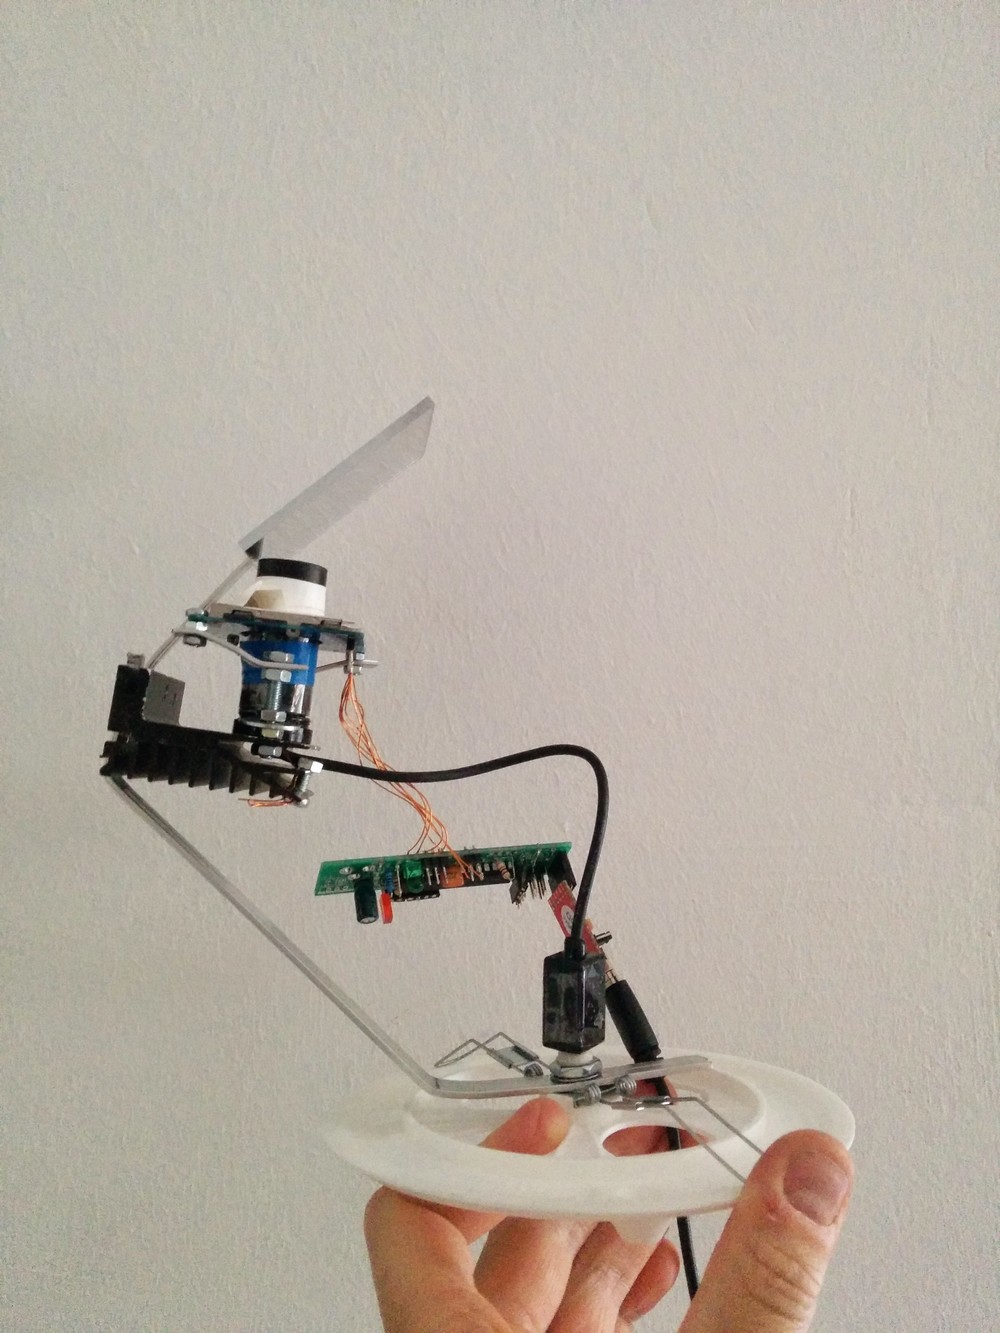
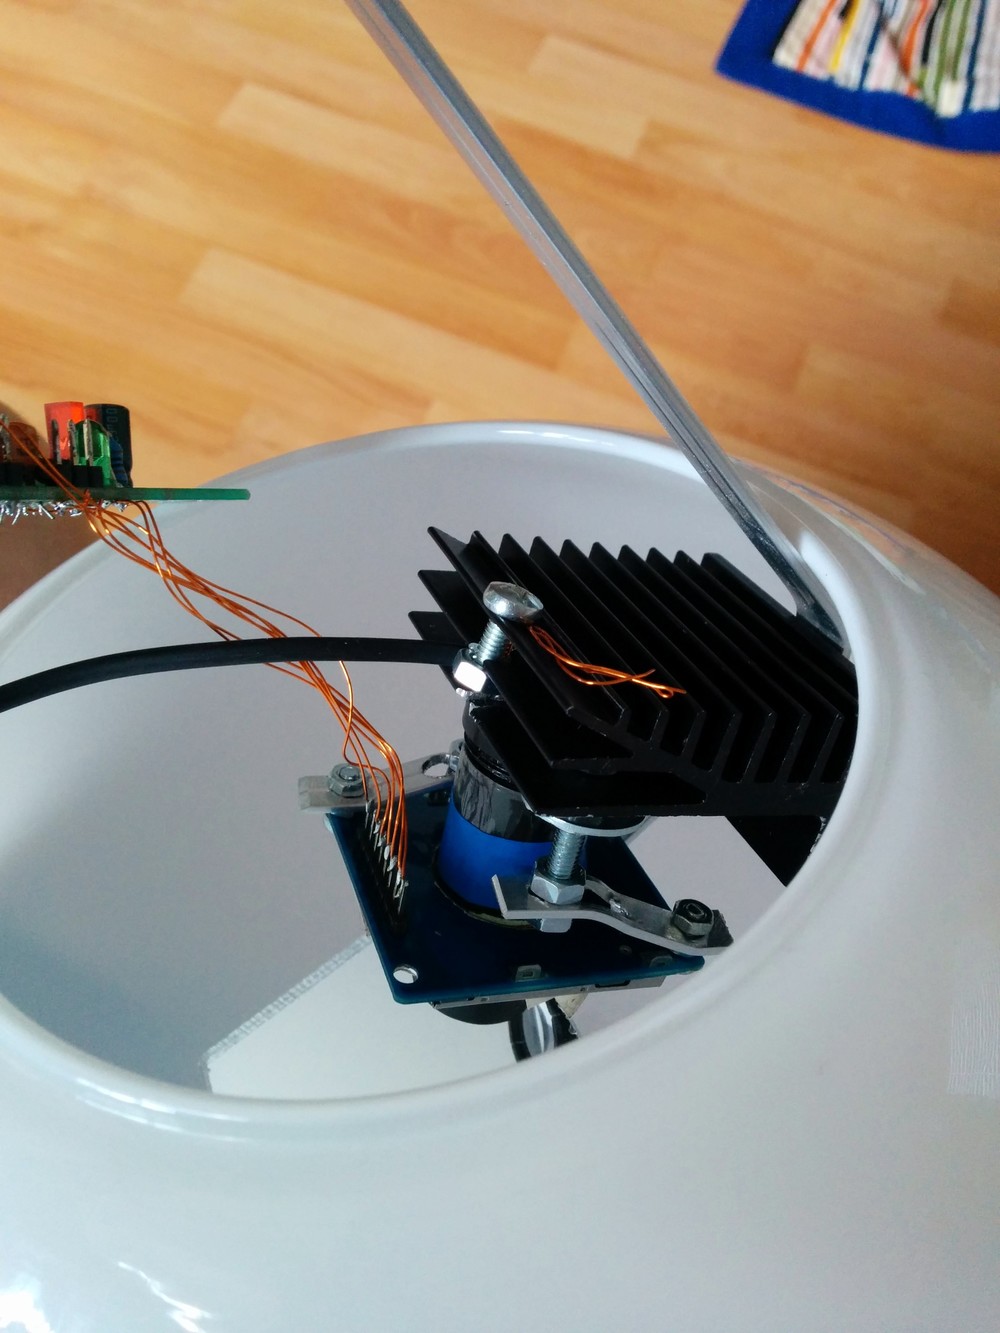
So IKEA was next. I found a 10 EUR spherical milky lamp of the right size that would double as a lamp housing and projection surface. However, in order to squeeze the projector into the lamp, I had to make a few modifications. First off, the projector turned out to be too big. When inside the lamp, the narrow distance between projection lens and projection surface would only give an image illuminating half of the lamp. A mirror installed at a 90° angle above the projection lens helped increasing that distance significantly. Now the lamp was illuminated perfectly.
Secondly, I removed the bulb, cable and fixture from the original lamp-base and replaced it with an aluminium strip holding the projector and mirror in place. The hole in the base provided enough room to accommodate the cables.
To drive the display, I modified some Adafruit LCD GFX library examples (space invader sprites!) that led to the result shown in the pictures. The clock is currently displaying the time with the occasional space invader character whizzing past. I thought about using the lamp as a scrolling display for twitter feeds etc. but the low resolution makes that a pain to watch. And it is a bedside lamp after all.
Going forward
Although I love the monstrous b/w pixel-look of the lamp, the resolution is simply too low to be very useful. I experimented with higher resolution colour displays (ILI9341, etc.) however they absorb much more light than the Nokia 5110. I also tried more powerful (mains powered) LED light sources which resulted in a black spot burned into the LCD (ouch). Active cooling might help but, again, I have to sleep next to the thing. I researched small, high resolution monochrome LCD displays but there does not seem to be a big variety of those anymore. The only ones I found were the Sharp monochrome memory LCDs which are too expensive to be butchered. Suggestions for low cost, high res monochrome displays are highly appreciated.
As for other applications of the projector, I am playing with the thought of augmenting my vintage radio build with a very simple status display. I tried projecting onto yellowed paper (for the vintage touch) and it looks totally awesome.
So this is it ... I would love to see the optics issue fixed and a bunch of these projectors popping up in public spaces :)
The video below shows an intermediate version of the lamp (without mirror) using the Adafruit GFX LCD library demo (apologies for the crappy out-of-focus camera work).
Bill of materials
Prices include delivery
- Car Logo Projector (Aliexpress) - 4 EUR
- Nokia 5110 LCD (Aliexpress) - 2 EUR
- Borduino - 4 EUR
- 12V power supply (Aliexpress) - 3 EUR
- FADO Lamp (IKEA) - 10 EUR
- TOTAL: 23 EUR